On small pieces of crazy patchwork straight seams are all you need to cover the block but when a block is bigger than about 25cm square seams can get very long and you can stitch yourself into a corner.
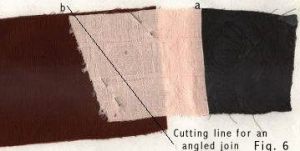
is as simple as joining 2 or more pieces of fabric together (Fig. 6). The join can be a right angle (a) or to get a diagonal join (b), overlap the ends of 2 pieces of fabric, cut an angle through both fabrics at the same time, and stitch them together with a 6mm seam.
Straighten one edge of the strip and stitch it onto the block as one piece.
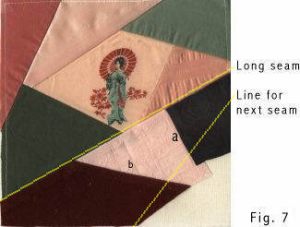
Tip - When sewing the next piece on put it at an angle so that the patch shapes are varied (Fig. 7).
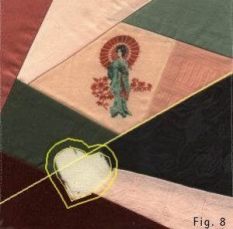
Is to split the seam with a heart or other shape. Mark 6mm inside finished heart size (seam allowance) and piece around the space (Fig. 8). Attach heart by hand applique or machine stitch with lace to cover the edges.
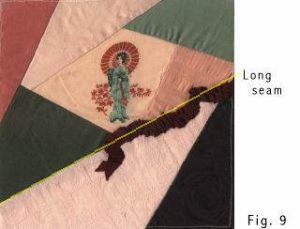
Stitch on a single patch of fabric and break the line with Ruched Ribbon, a Button Cluster or a flower trail that only covers part of the length, crosses the seam and finishes in the long patch (Fig. 9)
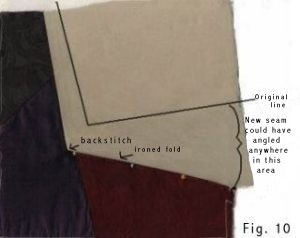
Make sure you have enough fabric to fill the angle and sew one seam (I usually stitch the longer of the 2 seams). Do a backstitch where you want the corner to be.
Flip the patch and iron a fold, at desired angle, for the second seam (Fig.10).
Put a few pins next to the fold to indicate where seam will be stitched (Fig.10).
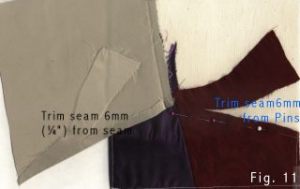
Unflip patch and trim seams, 6mm from fold and 6mm from pins (Fig. 11).
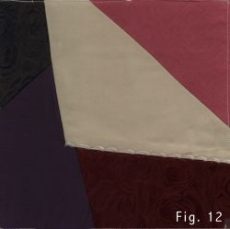
Flip patch again and secure the seam (Fig.12) in one of the following ways:
- Machine top stitch
- Hand applique
- Cover with ribbon, lace or braid
- Fringe edge of suitable fabric (top stitch above fringe to secure seam)
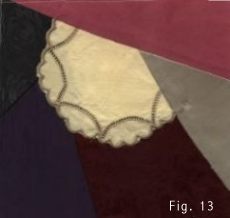
Use a doyley, place the lace or outer edge over both seams and then continue piecing (Fig. 13).
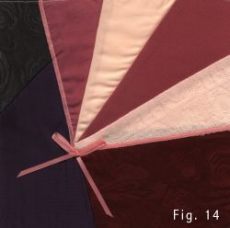
Fill the corner with a fan which can be pieced separately or each blade can be sewn through the background, cover the ends with ribbon and a bow completes the fan (Fig. 14).
Note blades do not need to be the same size or shape and the points do not need to match, the radiating blades framed with the ribbon creates the illusion of a fan.
Some fabrics can't be ironed - Don't use them. If you absolutely must use one, pin it flat along the seam as well as the edges and try using a pressing cloth when ironing surrounding patches.
Some fabrics fray, some stretch and some are transparent, the simple solution is to back them with iron on interfacing. Bias edges stretch and cause the seam to curve.
Whenever possible use a straight grain edge of the fabric but when you do need to sew a bias edge use tracing paper or photocopy paper between the fabric and the presser foot to prevent stretching. Align the paper with the raw edges, stitch the seam, fold and crease the paper and it will tear away easily.
Fabrics that slip can be a real pain. Pin them well and use paper between the fabric and the presser foot.